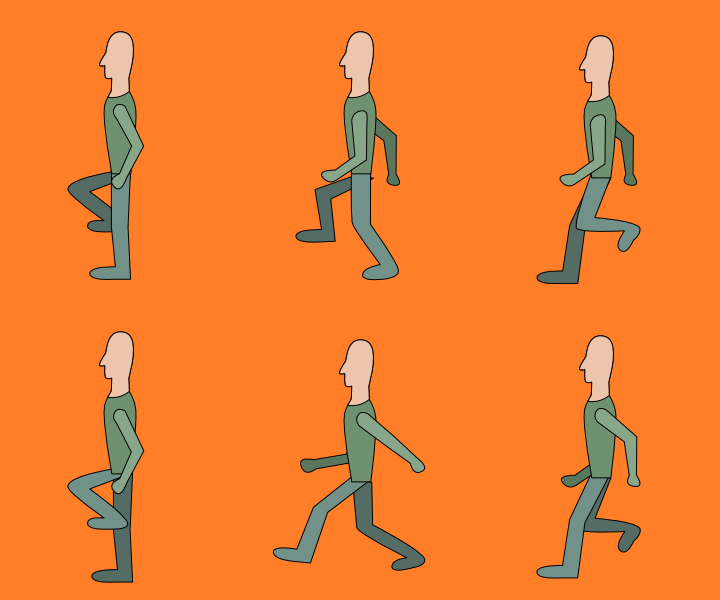
PROGRAMS USED (open source software):
Inkscape v0.46: Inkscape will be used to create and animate the frames of the character. It will then be used to export the individual frames. This tutorial assumes you already have a basic knowledge of the program and are capable of selecting objects, changing fill and stroke colours, layers, and editing nodes.
Gimp 2.6 will lastly be used to join together each frame to make an animation of the character walking.
TUTORIAL:
1 – In a new Inkscape document, draw a rectangle ![]() anywhere on the workspace. This will act as the background for the first frame of the animation. Ensure there is no stroke/outline on the square and change its colour to something fairly easy to see.
anywhere on the workspace. This will act as the background for the first frame of the animation. Ensure there is no stroke/outline on the square and change its colour to something fairly easy to see.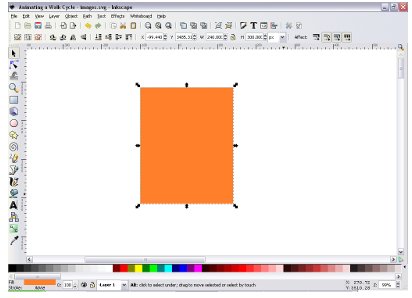
2 – Now right click on the rectangle and click on object properties. Change the id to ‘frame1’ and click ‘set’. This will come in very useful later on when we export each frame.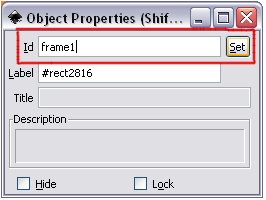
3 – The next step is to start drawing our character. The best way to do this is to draw each body part separately. For example, you should perhaps draw a head, 1 arm, body, and 1 leg. You don’t need to double up on the arms and legs at this point, as it will be easier to do it later. This will make the character a lot easier to animate. If you want to make the animation more complicated you could add more parts to the body, however for this tutorial we will stick to a fairly simple character.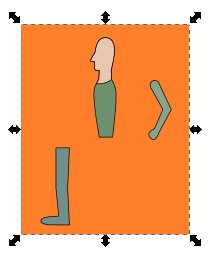
4 – When drawing each body part you should go into edit mode ![]() so you can see the individual nodes. It is important that on the arms and legs you add nodes at the joints as seen below. This will make it a lot easier to animate the joints.
so you can see the individual nodes. It is important that on the arms and legs you add nodes at the joints as seen below. This will make it a lot easier to animate the joints.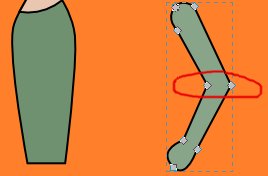
5 – Once you are happy with the look of each body part you can arrange them together so that it forms your character. Press Page Up on your keyboard to raise an object above another or press Page Down to lower the object. It is important that you get the layering of objects correct. For example, the arm is above the body, head and leg.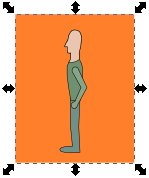
6 – Now we can begin animating our character walking. A walk cycle can generally have between 4 and 12 frames. However, for this tutorial we will use 8 frames. First of all we will animate the character’s leg. To help us, you can draw an oval shape with a stroke and no fill. This will act as a guide for animating the legs. Draw eight equally spaced dots on the oval. You can group the oval and the dots together so they don’t get in the way. Each dot is the point at which the foot of the leg should be throughout the walk cycle.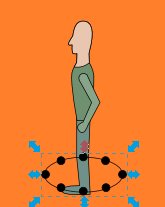
7 – We will also produce a similar guide for the arms at this point. This guide will look like a curve and we will place 5 evenly spaced dots on it (see below). We can again group these dots and curve together. However, we will not use this arm guide for the moment.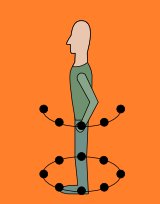
8 –Going back to the legs, edit the nodes of the leg so that the foot is on the lowest dot of the oval guide.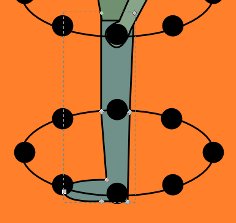
Part 1 | Part 2 | Part 3