9 – Now you should copy the entire image you have created (including the guides). You paste it 7 more times in a line on your workspace. Make sure they are roughly equally spaced apart. Each one of these images will represent a frame of the animation.

10 – For each of these new images you should right click on only the rectangle and click object properties. The id should be changed to the frame number of the image. So the second image will be ‘frame2’, the third image ‘frame3’ and so on. Remember to click set to change the id.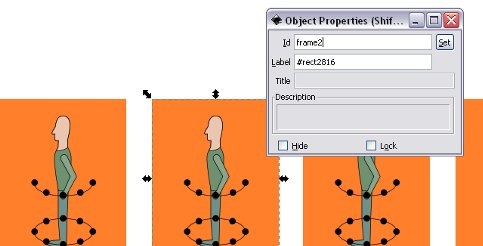
11 – Using the oval as a guide, edit each leg so that the foot makes its way around each dot of the oval anticlockwise, as shown below.
12 – The next step is to animate the second leg. However, we can cheat by copying the legs we have already animated. When we walk, our legs are usually at opposite places (when one leg is forward the other is back). So for the first image (frame1) we can copy the leg from the fifth image (frame5). For frame2 we should copy a leg from frame6, for frame3 we should copy a leg from frame7, and so on until all the images have a second leg.
13 – Make sure all the second legs are behind the first leg by selecting each one individually and pressing Page Down on your keyboard. You can also give the background legs a darker colour to distinguish them from the front legs.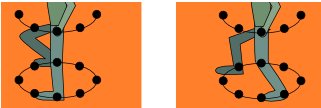
14 – Now, we can deal with the arms. Using the curve shaped guide you created earlier, on the first frame, edit the nodes of the arm so that the hand lies on the middle dot of the curve.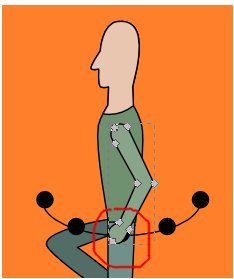
15 – On frame2 edit the arm nodes so that the hand rests on the next dot on the left. For frame3 place the hand on the far left dot on the guide. For the following frames work back your way back along the dots. When you get to the other end reverse the direction. Use the image below as a reference.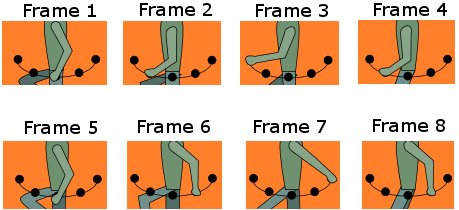
16 – Once you have completed the front arm on each frame, you can get rid of the guides.
17 – We can now work on the back arm of each frame. To do this you should copy the arm from the frame 4 frames in front. For example, to get the back arm for frame1 you should copy the arm from frame5, as you can see below. Do this for all the frames.
18 – You should lower the back arms into the correct position by pressing Page Down on your keyboard. Like the legs, you can fill the back arm so it is slightly darker.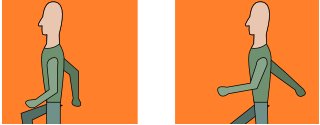
19 – You should be able to see that your character looks as though he is walking. However, if you were to play back these frames now it would look unnatural. This is because when we walk we bob up and down slightly. We are at our tallest when are legs are close together and at our shortest when our legs are furthest apart. Frame 1 and frame 5 should be where your character is tallest, whereas frame 3 and frame 7 should be when your character is shortest.
Draw a line from the top of the head of frame 1 to the top of the head of frame 8.