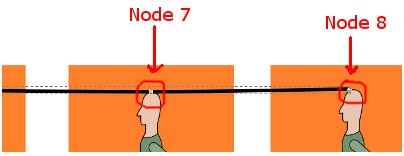
20 – enter the edit node mode ![]() . Double click on the line at frame 3, 5 and 7 to add new nodes. Move node 3 and 5 down about 4 pixels by pressing the down arrow on your keyboard 4 times. Also move node 8 down about 2 pixels. This should create a curved line.
. Double click on the line at frame 3, 5 and 7 to add new nodes. Move node 3 and 5 down about 4 pixels by pressing the down arrow on your keyboard 4 times. Also move node 8 down about 2 pixels. This should create a curved line.
21 – Now you should move each character down so that the top of the head is level with the curved line. Once you have done this for all the frames you can delete the curved line.
22 – You have finished animating your character. Before exporting the frames you should save your document.
23 – Finally, you can export your frames as you have finished animating. Select each rectangle by holding down shift and clicking on each rectangle, but do not select the characters. Now you can click on the export button ![]() or press shift + ctrl +E. Make sure you select ‘batch export selected 8 items’. If the number is more or less than 8 it means you have selected more or less than your 8 rectangles. Now you can press ‘export’, and your frames will be exported to the folder you saved your document in.
or press shift + ctrl +E. Make sure you select ‘batch export selected 8 items’. If the number is more or less than 8 it means you have selected more or less than your 8 rectangles. Now you can press ‘export’, and your frames will be exported to the folder you saved your document in.
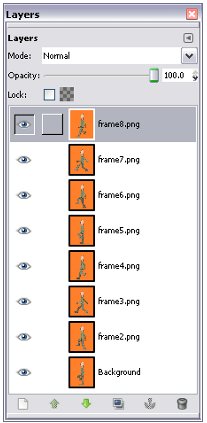
24 – Lastly you can join your frames together. A good program to use for this is The Gimp (version 2.6.4). In the Gimp click File>Open as Layers. Then select your 8 frames of your character walking and then click Open. If you look in the layers toolbar you should see that the frames are in order (frame1 is at the bottom and frame8 is at the top). If they are not you can drag each layer so that they are in order. 
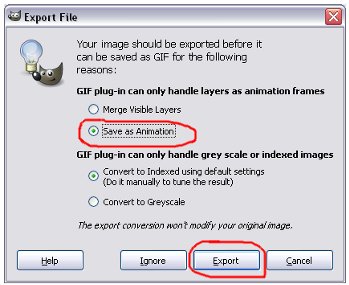
25 – Click File>Save As and save your work as walking.gif Don’t forget the .gif part otherwise it won’t animate. A dialog box should pop up where you should select ‘Save as Animation’ and then click Export. At the next dialog box click save. You can now find the file and play back your animation.